Category Archives: onion

Beefy Soup

So many vegetables!

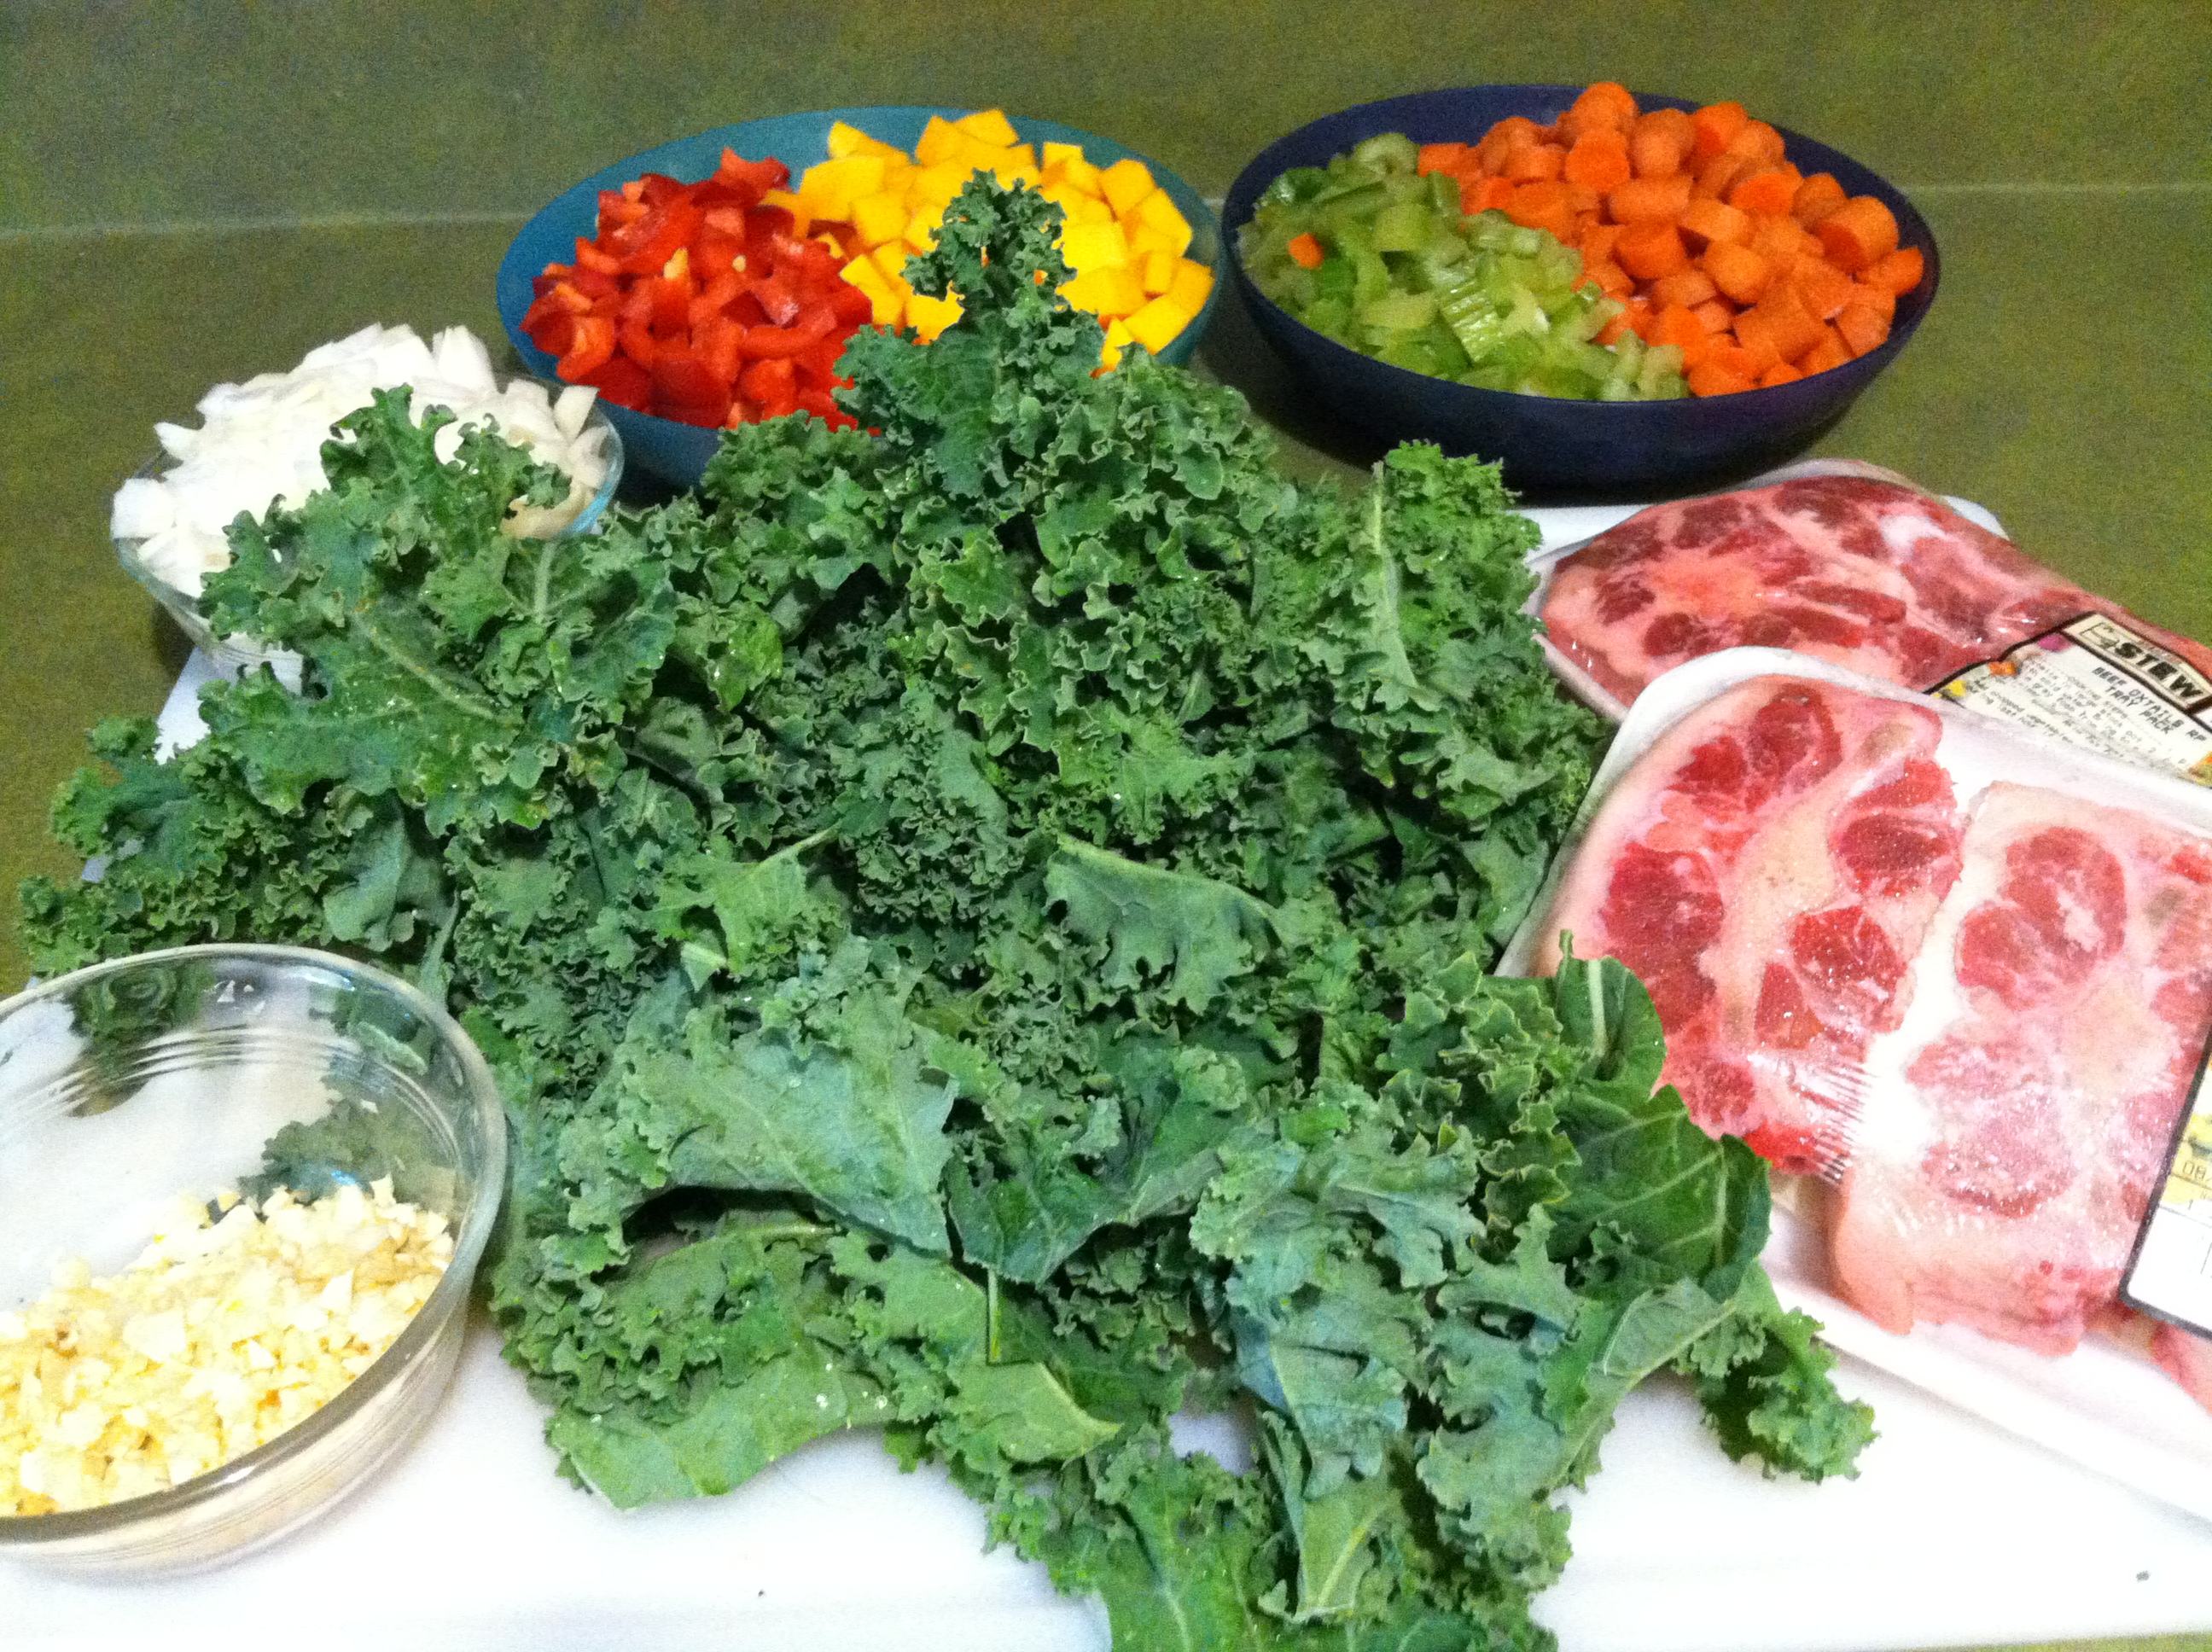
So many vegetables! I could just eat them raw.

I’ve been super lucky throughout my pregnancy. I’ve been very healthy through most of it. I’ve only had cravings for healthy food, mostly broccoli. I’ve been working on stocking up some pre made food for after I have my baby. I wanted to make something that would be great from before baby and recovery after baby. This soup is made with marrow bone broth and ox tail, along with a whole host of amazing vegetables. The extra iron and vitamins in the soup will really be beneficial for  any woman but especially the post labor woman in your life. After I made it I realized that I just and to have tomatoes! So I went back and added a few can of diced tomatoes, and some tomato paste. It really kicked up the heartiness of the soup. However, I don’t have any pictures of beefy soup 2.0 so just imagine how great it looks!


Beefy Soup

Bone Marrow Broth – go here for that recipe

7 ox tail pieces (give or take your own preferences)

1 medium onion diced

2 red bell peppers diced (about 2-2.5 cups for the next four ingredients)

1 small butternut squash diced

4-5 stalks of diced celery

4-5 carrots diced

a head of garlic chopped (yes a head, it’s recovery soup! garlic is good for that)

1.5 heads of kale ripped up.

1 tbsp black pepper

1 tsp hot peppers or cayenne (remember, recovery)

1 tsp parsley

1/2 tsp thyme

1/2 tsp smoky paprika

1/4 tsp majoram

1/4 tsp savory

(2-3 cans of diced tomatoes and 2 cans of tomato paste)


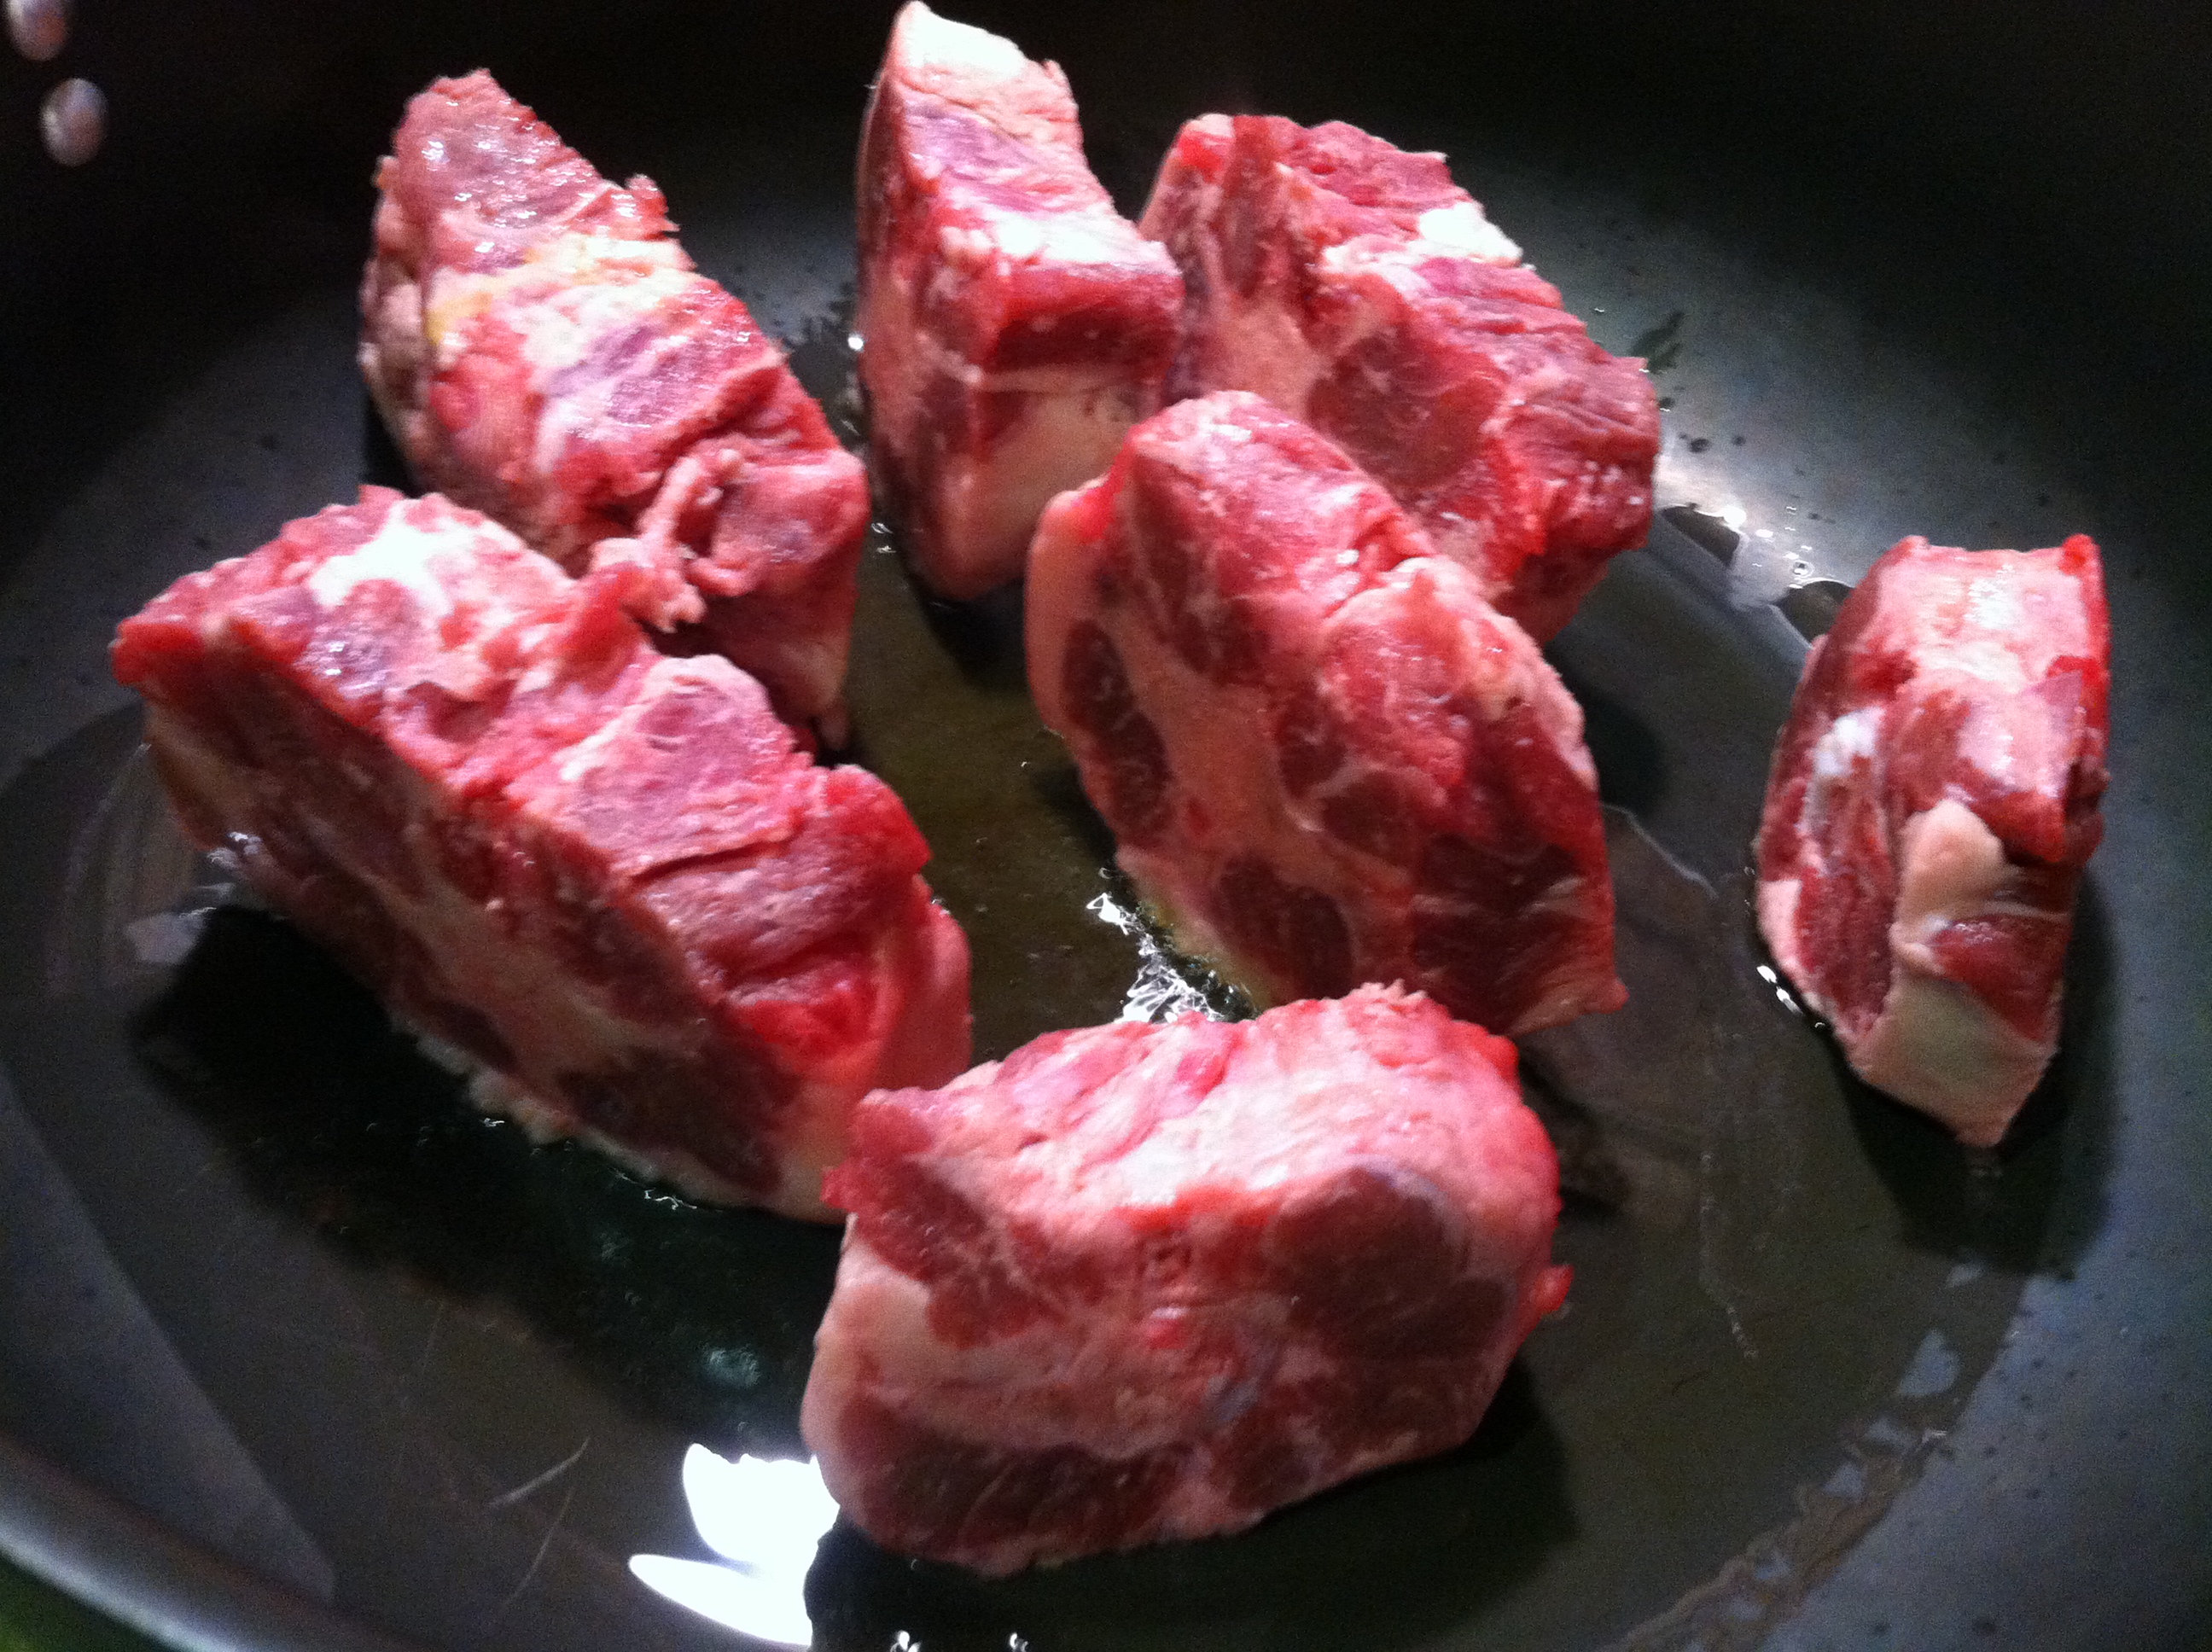
meat, meat, meat, yummy meat

Frist brown your meat in a very large stock pot. Everything will be going into this pot eventually so make sure it’s big. I like to brown the meat because it adds a lovely depth to the flavor. These ox tails had a thick side of fat, so I started with that side first to render some fat to cook them in. See? I’m smart. Brown all sides, and set aside.

this is where delicious starts

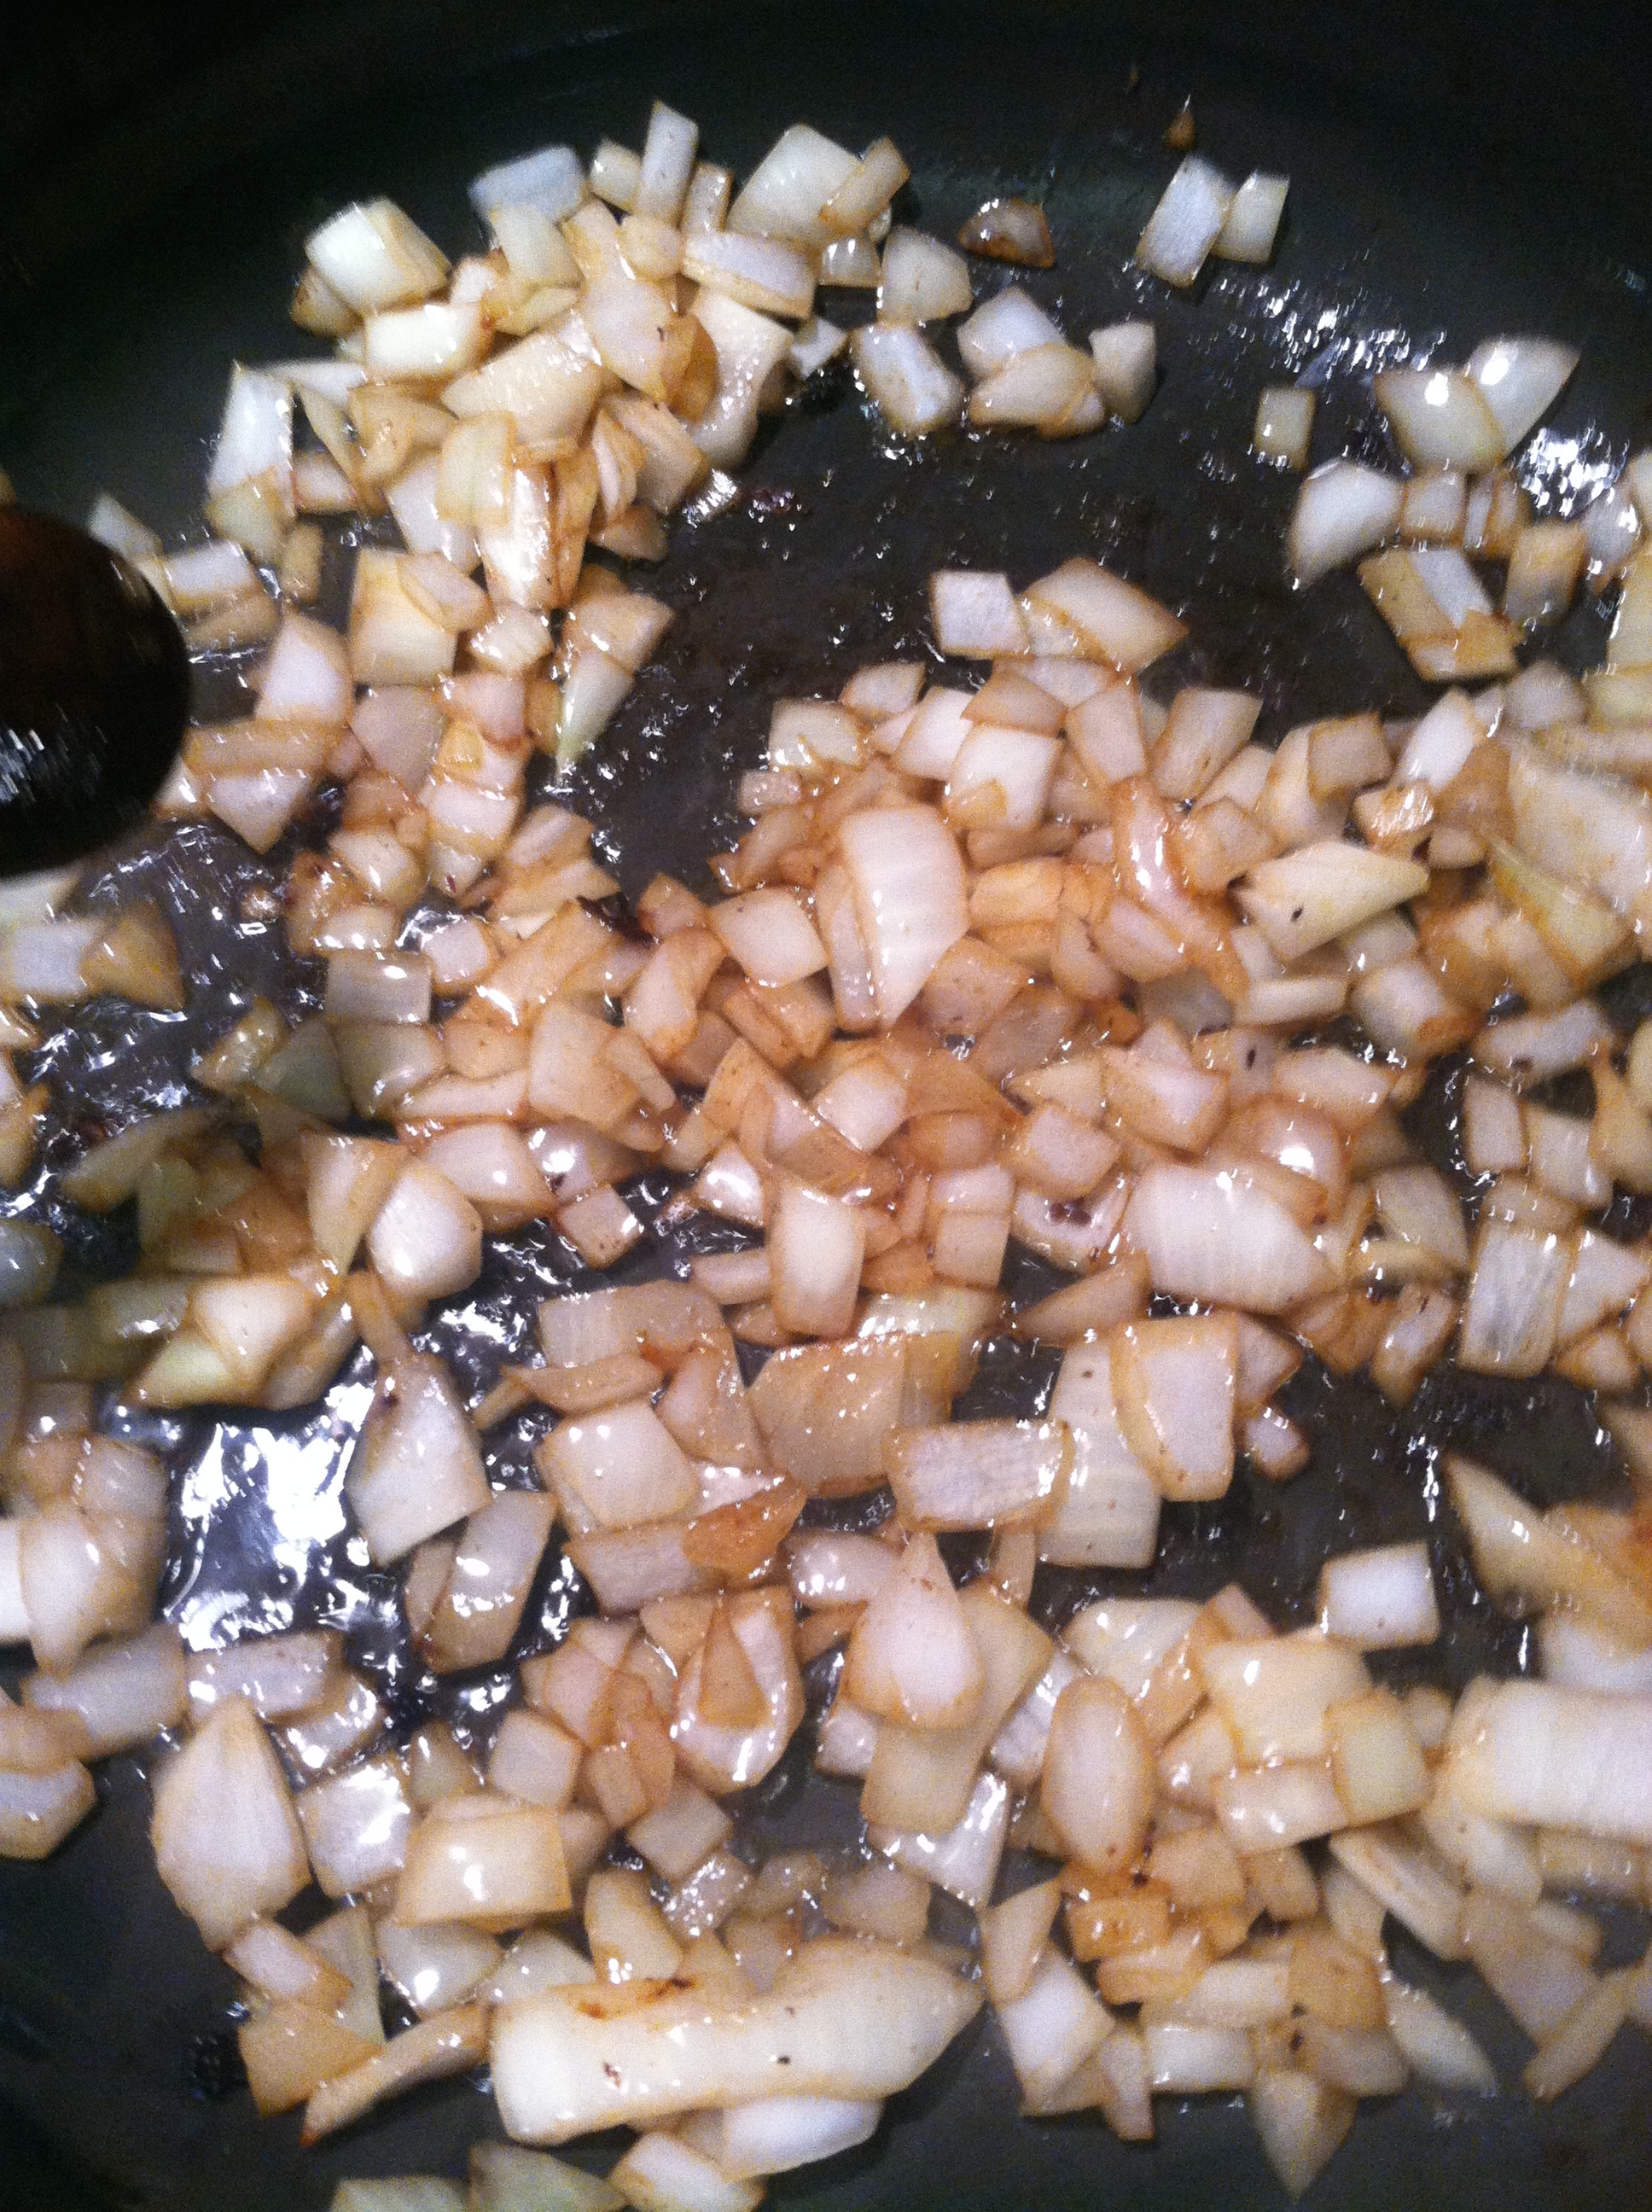
This is where the magic starts. The bottom of the pan will have all sorts of meat and fat stuck to it. By cooking the onions, the moisture will help loosen up that deliciousness, giving that depth I was talking about. Cook onions until they are starting to become translucent. Note they are not actually browning, that’s the good stuff stuck in the pan adhering now to the onions. Lucky onions.

so pretty

When your onions are soft, add the squash and the red peppers. Keep temperature at medium high and occasionally stir vegetables. Cook for about 4 minutes.

IMG_4438

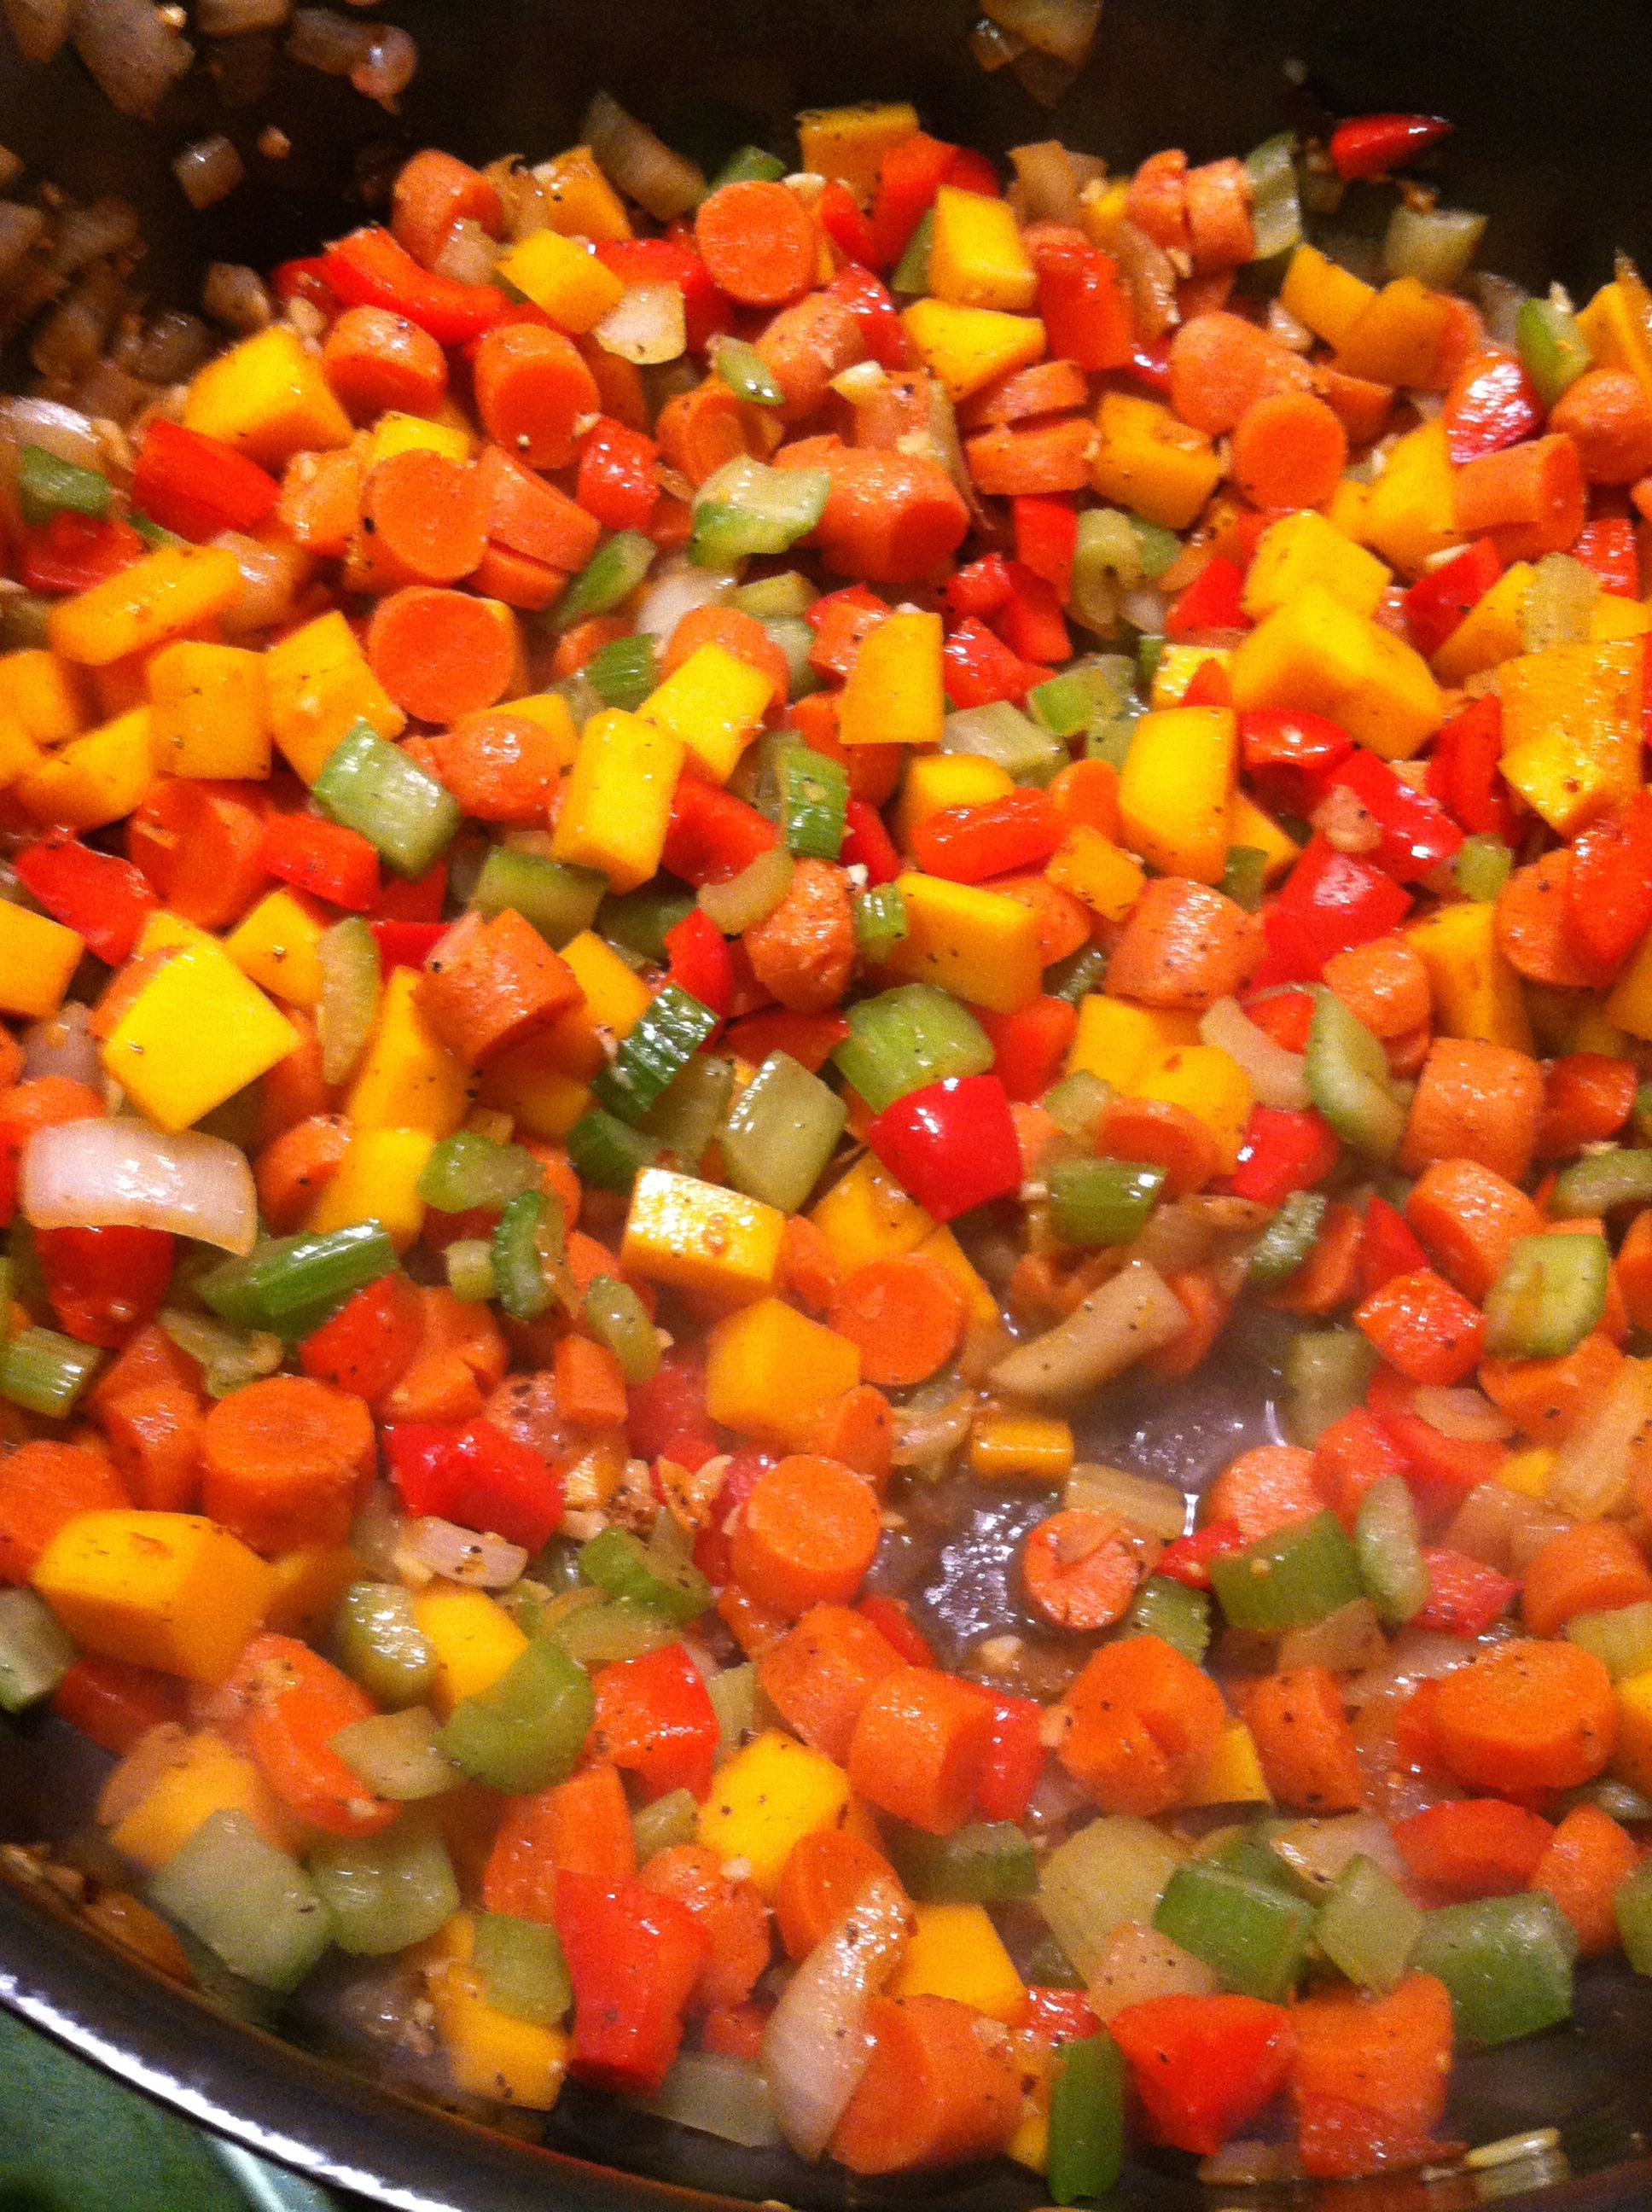
Add in carrots and celery. Continue cooking for another 5 minutes.

IMG_4439

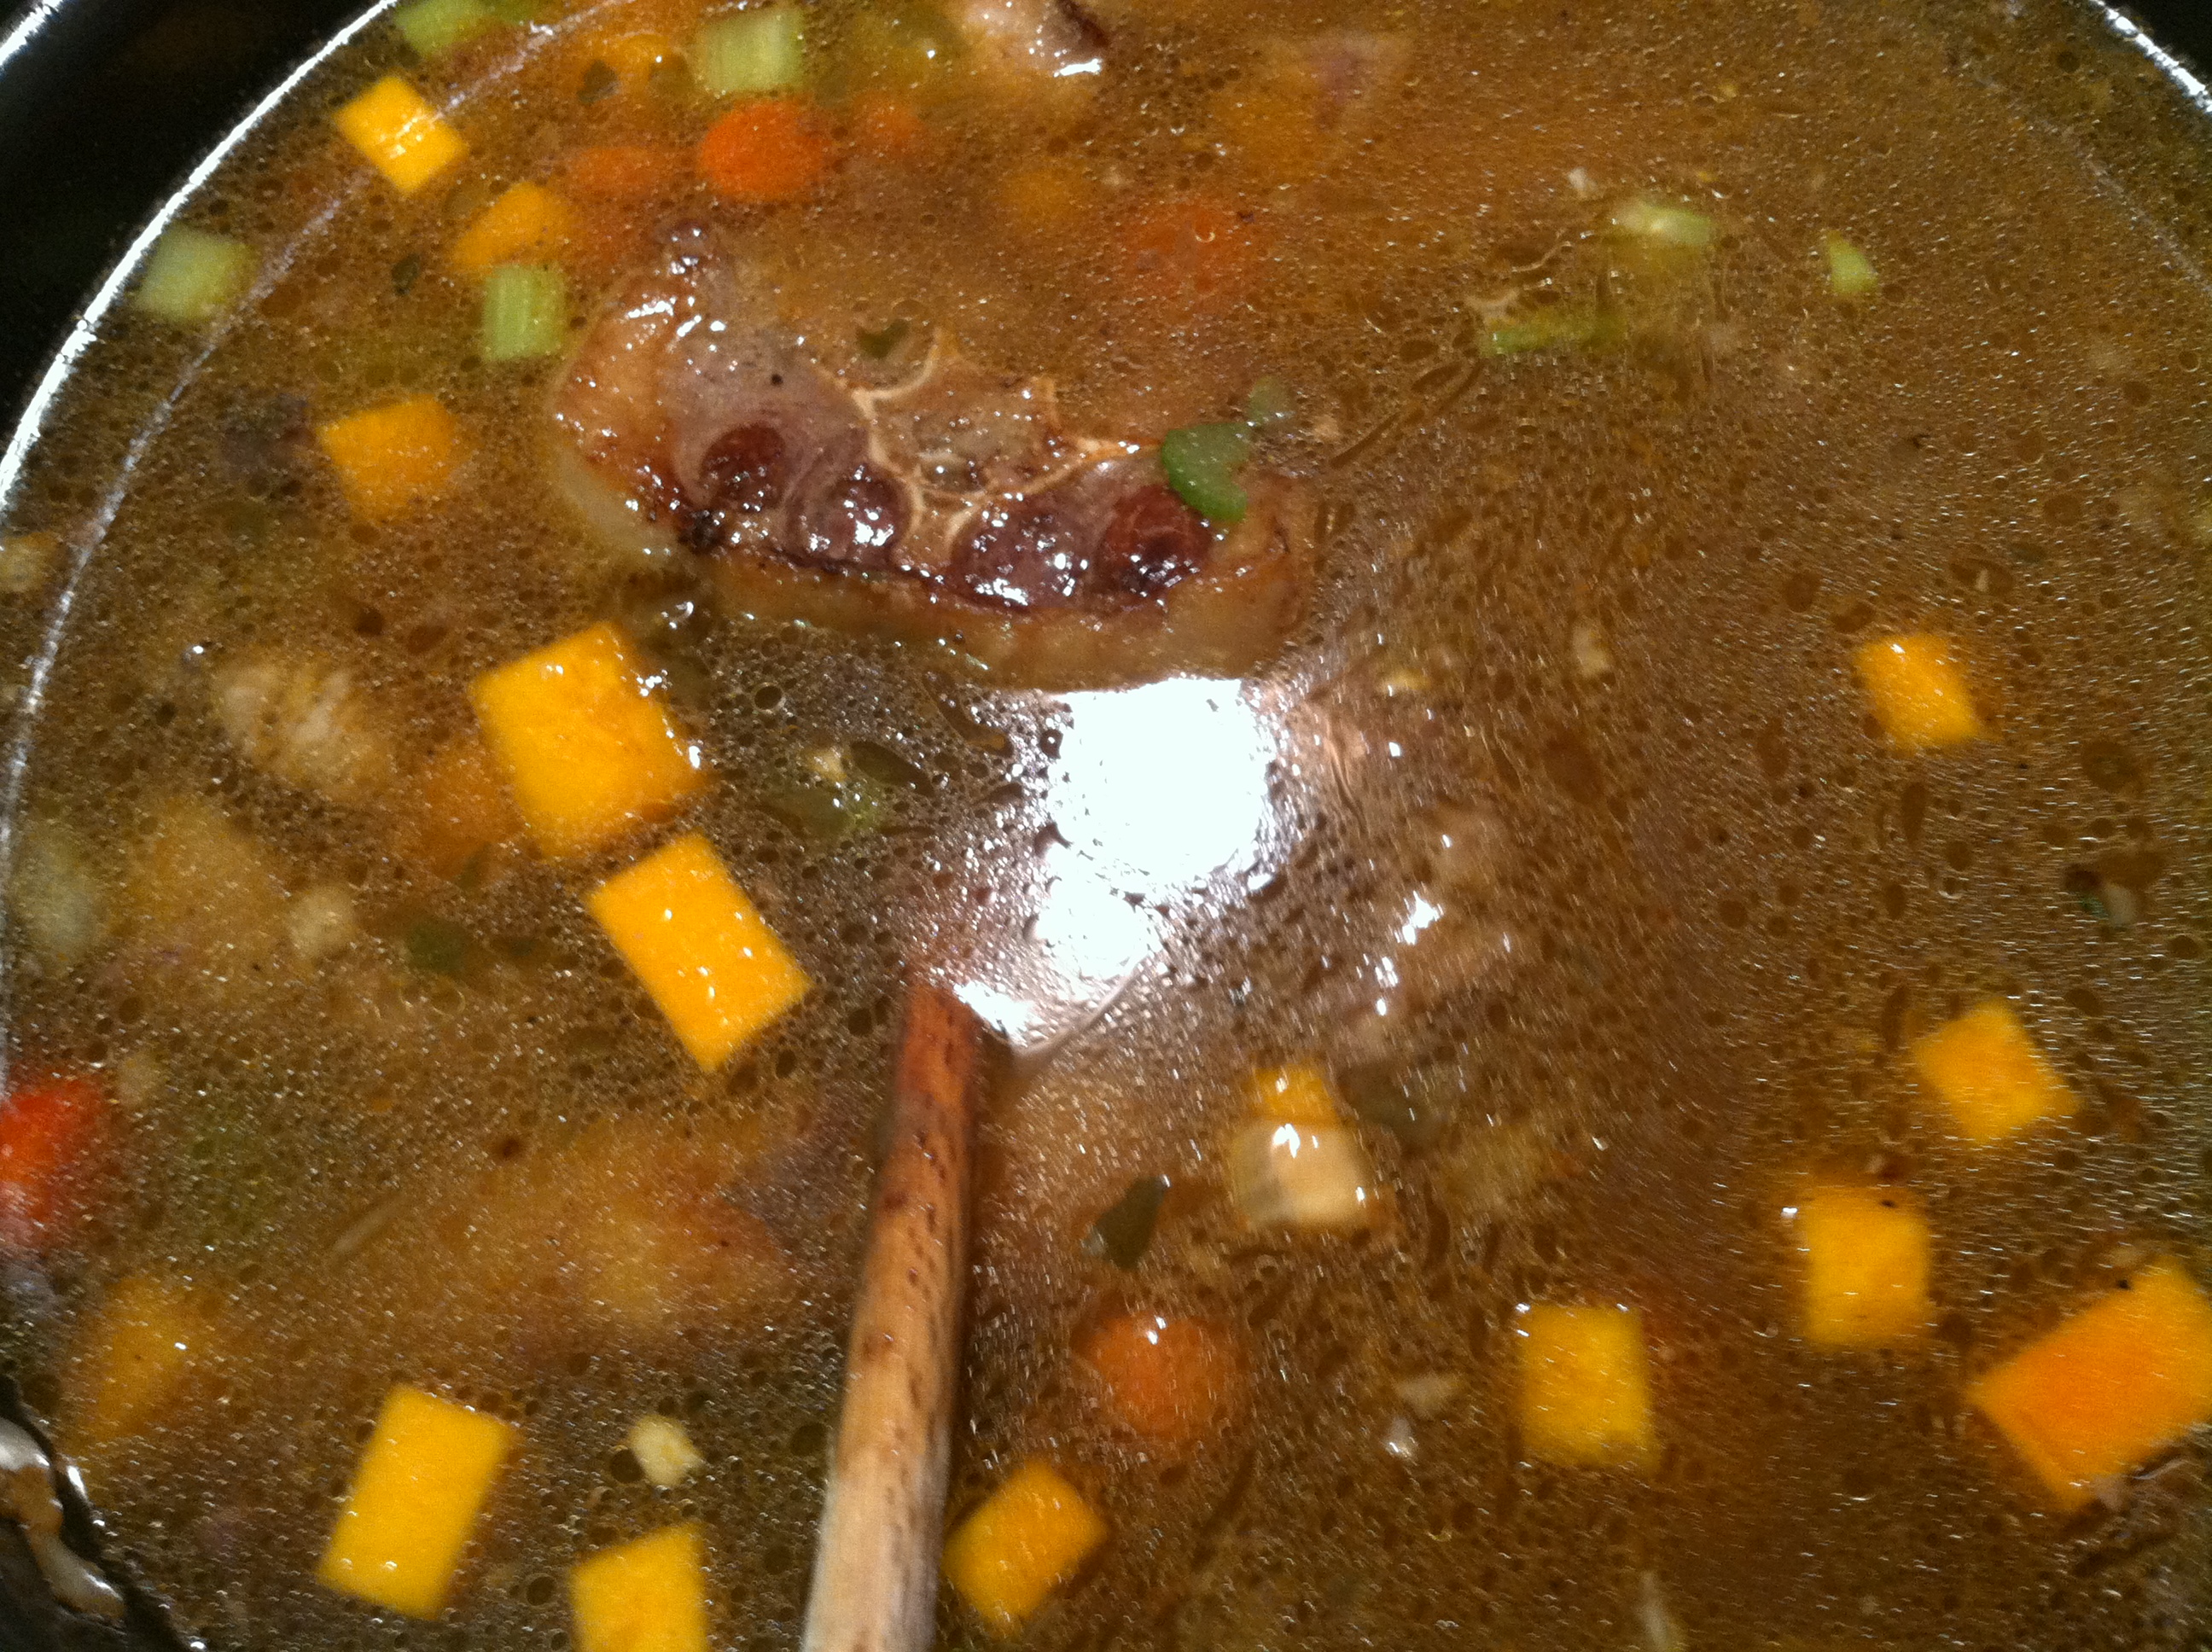
Add seasonings, meat, and broth. Look at all that dark rich goodness! Bring soup to a slow boil for about 15 minutes. Add in kale for last two minutes. You can also skip the boiling and cook on low for about an hour. When all the vegetables are soft and your meat is cooked through your soup is done. Now I said above that I decided this soup would be even better with tomatoes. I wish I thought of that first! Add about 2-3 cans of diced tomatoes and two cans of tomato paste when you add in your broth. It gives it a great rich color and really ups the flavor. But this soup was delicious just as it was, but even better with the tomatoes. I left the meat on the bones. It’s a preference thing. If you’d rather not have bones in your soup you can remove the meat after you boil it.

IMG_4441

beefy soup

This makes a ton of soup. I planned on that because I wanted to freeze a bunch for post baby meals. This is a great fall/winter soup that’s super hearty and would make a great gift for a friend in need of a bit of an immune boost.


Beef Jerky

I know I’ve blogged about it before here. But, I recently made more beef jerky. Since I’ve become pregnant I’ve really had a diminished taste for things like salt and sugar. Most potato chips are too salty for me. So everything I make lately has a lot less sugar and salt in it. Now jerky is one of those things that you must have salt for. It preserves the meat. Below is the modified recipe. I ran out of cumin so mine didn’t have any but you should add it because it’s smart. I had smoky paprika instead of regular. I think it makes for a great smoky flavor with out the added chemicals of the liquid smoke.

Meat!

Jerky

1 lb of lean beef

1/2 tbsp salt

1 tsp black pepper

1 tsp onion powder

1 tsp garlic powder

1/2 tsp red pepper

1/2 tsp smoked paprika

1/2 tsp chili powder

1/2 tsp cumin (I forgot to get more but it’s good in the mix)

1/8 cup of soy sauce (use fancy tamari for gluten-free)
I’m going to try to play around with different flavors because I think I’d like to offer it for sale. This time around I attempted to run a cost comparison on the meat vs the final product. I think I can produce this at a reasonable rate.

For those that wish to make it themselves above is the recipe I recently used (notice the smaller amounts of salt and soy sauce). I think it gives plenty of great flavor without so much salt. Also no sugar! I don’t understand why all jerky contains sugar, drives me crazy. If you’re looking to save money get a larger lean roast. Partially freeze it, and cut it by hand. You need a pretty steady hand and a very sharp knife. Make sure to trim all the fat.

cut meat and trimmings

I saved my trimming for adding to ground meat or maybe awesome dog treats. Our local HEB sells very thin top round and Milanese style cuts of beef that are perfect for jerky if you don’t want to hand cut it. It does make life easier but you pay more for the precut meat. Mix seasoning well and pour into a zip bag with your meat. Make sure all the pieces are covered with the seasoning, then refrigerate over night.

mmm gooey

mmm gooey

you will soon be delicious

The time varies greatly on how long it takes to full dry. The thickness of the meat, the ambient humidity, and your dehydrator will all play a factor in this. If you check it every 1-2 hours your first time you’ll have a better idea how well your unit runs.

Playing Tetris with raw beef is fun!

The thinnest pieces will be finished at 4 hours the thicker ones at 8. I make sure to rotate the trays to allow for even flow of air every two hours. When I rotate I check the pieces for dryness. I also live in a very humid place so my times maybe longer than yours.

You can buy extra racks for it. It was a reasonable price and highly rated. I have no affiliation with this brand but I definitely would recommend it.

You can buy extra racks for it. It was a reasonable price and highly rated. I have no affiliation with this brand but I definitely would recommend it.

glorious dried meat

For storage we prefer to vacuum seal the meat into snack size bags. In a regular zipper top plastic bag, in our climate, the meat lasts around 2 months. (I found some in the back of the cabinet that had gone bad, so sad) but the vacuum sealed bags lasts longer than that.

I still have yet to find how long that is. The only preservative is salt so there will be a shelf life. But, if you’re stocking up for Armageddon, might I suggest vacuum sealing and then freezing? Otherwise for normal consumption a batch like this is fine in your cabinet until consumed.

T has taken to cutting it up and adding it to the homemade trail mix. Great clean energy all day long!


Chorizo Stuffed Pork Loin

Cassie, what’s with all the stuffed meat lately? Well, glad you asked. It’s delicious and fun! Meat inside of meat? It’s like Epic meal time up in here. Don’t follow this link at work, some of the language is bleeped by a bird.

After the success of the spinach-bacon-chicken I searched my fridge for new ingredients to stuff inside a pork loin I had laid out. I found some chorizo in the meat drawer, score! Now what kind of vegetables go well with Chorizo? Why orange ones! Don’t ask me why it works, it just does. I wanted the seasoning on the outside  to match the chorizo inside. Read along for another amazing meat in meat recipe:

Chorizo Stuffed Pork Loin

1 pork loin ~5.5 lbs

1 package of chorizo 10oz

3 carrots diced

1/2 yellow onion diced

4 cloves of garlic minced

1 sweet potato cut in chunks

1tsp chili powder

1 tsp salt

1/2 tsp smoked paprika

1/2 tsp onion powder

1/2 tsp garlic

1/8 tsp of cumin

1/8 tsp of ground oregano

In a frying pan cook the chorizo on medium heat. While that cooks dice your onion then add it to the chorizo. Dice your carrots and again add them to the pan. Cook this mixture for another 5 minutes.

While it cooks prep your sweet potatoes and cut your loin. I time my cooking by how long it takes me to slice up my veggies. If you feel the need to prep your veggies ahead of time, cook each for about 2 minutes before adding the next ingredient. Remove the mixture from the heat and let it cool down. When it is cool enough to handle, stuff inside your pork loin.

Fold meat back together.

Place loin inside of a ring of sweet potatoes (any one hear Johnny Cash right now?) In a well oiled baking dish. Mix all the spices together in a small bowl and sprinkle over top of loin and potatoes. Toss the potatoes a bit to coat with seasoning.

I baked the loin in the oven at 400 uncovered for 1.5 hours while I rocked Grace at the gym.

This was too hot and too long. The meat came out tough and dry. Next time I’ll cook it at a much lower temperature for a longer time. That’s usually my MO, but I wanted to try something different. If you are making this at home, and you should because the flavors are wonderful, make sure that the fat side is up. Bake it covered at 200 for at least 4 hours.  As always check internal temperature before eating. You could definitely make this in a crock pot or deep pot and let cook low and slow while you are at work. I will make this again but much slower.

The flavors were awesome and as I said before, orange vegetables go great with chorizo! Are you hungry why not try this out?


Spinach stuffed Chicken Breasts

If you are a fan of my creamed spinach, you will LOVE this dish! My friend Rebecca is just starting her paleo journey and came up with this. I tweaked it a little for my own preferences, but I’m so thankful she gave me the idea for this. It was super tasty.

Spinach Stuffed Chicken

4 pterodactyl breasts (or enormous chicken breasts)

6 pieces of bacon diced

1 package of spinach (the frozen brick is 80 cents at my grocery store)

1 yellow onion diced

5 cloves of garlic minced

1/4 cup and 1 table spoon of coconut milk

1tbsp red pepper

A few dashes of the following: Cajun seasoning, salt, pepper, and garlic powder

1tsp xanthan gum (omit this if you prefer)

Cook up the bacon bits in a pan on medium high until crispy.

Remove bacon and keep the fat in the pan. Add the onions to the pan and sauté until they start to soften. About 3 minutes. Add the garlic and cook for another 2 minutes.

Add the spinach and red pepper and toss the pan a few times until evenly distributed. Remove from heat and add to the bacon bits. Mix and set aside to cool.

While your spinach cools, slice your chicken (pterodactyl) breasts in half making sure to keep one side still attached. If you are feeling particularity skillful try to only cut from the top so you have what is essentially a chicken breast mitten. When the stuffing is cooled enough to handle, stuff the breasts with the spinach mixture.

Place them in a well oiled baking dish. Pour the 1/4 cup of coconut milk on top of the breasts then season them with your remaining seasonings.

Bake covered in an oven at 400 for approximately 45 minutes. Check with a thermometer that the internal temperature is 180.

When done pour out the pan drippings into a stock pot, turn temperature to medium high. Add the remaining coconut milk and xanthan gum. Whisk until the mixture begins to thicken.

We ate ours with roasted brussel sprouts. I love brussel sprouts and noticed they were super cheap at the store in frozen dinner sized packs so I bought a few. Apparently I thought this was a good deal last week too. We now have a LOT of frozen brussel sprouts. T told me not to buy any more for awhile. Ooops.

This meal is so amazing! Try it today.


Burgerspiration

It’s hot. Oh you didn’t know summer was hot? *wink* Summer is for cooking outside and eating burgers! This burger more closely resembles a salad when done. I don’t really try to replace the bun with something paleo. I like to have lots of toppings on my burgers so it just ends up a mess anyways.

This glorious mess is tomatoes, onions, avocados, cheese (primal), bacon, lettuce, and a homemade mix of mayo and siracha. T had easy eggs on his too. The burger patties I seasoned with the quad of seasonings I use in EVERYTHING; garlic powder, onion powder, black pepper, and salt. The grocery store had thick delicious patties on sale so I didn’t mix them or shape them. Sometimes when it’s so hot, it’s nicer to do nothing.

The orange spikes are some mango that was also on sale! If fruit is cheap its in season and delicious.

People will rib you for not eating a bun at first. They will understand when you pile all the amazing stuff on top. I’ve actually done this at a few BBQs and had non paleo eaters follow suit because they wanted to fill up on the yummy stuff and not bread. So grab a fork and knife and dig into a burger this grilling season.

What are you favorite burger toppings?


Delicious and Easy

Sunday we had some friends over for dinner. Below is what I made. Tandoori chicken using this marinade. Roasted butternut squash in leftover bacon fat. “Creamed” spinach made with coconut milk.

I’ve mentioned this marinade before. It’s super easy and tasty. A few tablespoons in a zip top bag with your protein is all the prep you need to do. I let the chicken marinate most of the day then I grilled the chicken outside.

Notice the gloves here?

My skin has a very strange reaction to raw butternut squash when it’s unpeeled. I can eat it fine, I just can’t handle it while raw. I either get T to do the prep work or I wear gloves to avoid it. We made bacon for breakfast and had delicious bacon fat left over.

I scooped some of the fat out then tossed the squash in the remaining fat reusing the exact same pan. (This works for all kinds of vegetables. Try it on broccoli and carrots)

Why make your life harder and wash all those dishes? It roasted at 350 until golden brown. About 30 minutes.

This spinach has to be one of my all time favorite things I’ve ever come up with. It’s so good! Check here for the original recipe.

This was a totally paleo meal that had very little prep time and was very tasty. If you’re still struggling to make meals make sense; take this approach and roast different veggies and grill meat with different marinades. It really is that simple.


Thursday’s Meals

I’m so sad to report that I accidentally deleted most of the pictures I took today. Sad face. To make up for it I’m presenting two new recipes. Gasp! I know it’s been awhile but I’ve finally eaten something that I think is worth sharing. Head on down to dinner if that’s what you came here for, otherwise:

Breakfast- was left over chorizo and eggs with collard and mustard greens.

Lunchish- was some pulled pork that T had pulled from the freezer, and some sliced cucumbers. I said ish because it was slightly larger than a snack but not quite a meal.

Dinner- was pretty good. I made a huge shoulder roast also called a Boston butt. Sam’s club is currently selling two this size for $20. Guys that’s $10 for a huge chunk of meat! That will last these two carnivores several meals.  I served the pork over cabbage and onions. Below are both recipes. I apologize for the lack of pictures again.

Mustard Caraway Spice Rub

5 cloves of garlic

1 tbsp of fresh thyme

2 tsp caraway seeds

2 tsp ground mustard

1 tsp of coriander

1 tsp onion powder

1/2 tsp ground oregano (I didn’t have fresh, if I did I’d go with a TBSP)

1/4 tsp cinnamon

1/4 tsp cloves

1tbsp of salt

1 tbsp of olive oil

Blend all the ingredients in a food processor. Rub over the entire roast. Place roast in a deep pot or crock pot. Cook on low until tender. Mine cooked 8 hours. This is a meal for a busy day. The seasoning is quick and the cooking is long, perfect for a long working day work. If you use a crock pot or a stock pot with a tight lid you will not have to add any water. But if your crock pot cooks hot or your stock pot doesn’t have a good seal to keep moisture in you’ll want to add a little bit of water to the bottom to prevent burning. The juices will eventually start cooking out so only add a very little. About ¼ cup should be enough.

I made gravy from the drippings with the addition of a bit of xantham gum. It’s considered paleo by most accounts but if you are concerned just omit it.

Cabbage and Onions

1 small head of cabbage sliced thin

1 onion sliced thin

3 cloves of garlic minced

2 tbsp coconut oil

1.5 tbsp apple cider vinegar

1/4 cup of water

In a frying pan sauté the onions on medium high heat in coconut oil (or any fat you like). When onions start to get clear add the garlic.  Cook for another 3-4 minutes. Add vinegar and cook onions until vinegar evaporates. Add the cabbage and water and turn the heat to medium low. Toss the cabbage a few times to evenly mix onions and garlic. Toss every few minutes and add water if the pan gets too dry. You don’t want to burn your cabbage just cook it until tender. This should take about 20 minutes.

Paleo Tip 4- Go big or go home. I bought about $100 worth of meat today. It took up most of my counter. All of it on sale and in bulk from Sam’s club. It took me 20 minutes to repackage it into meal size portions in freezer bags which involved cutting a huge pork loin into thirds ($20 for the whole thing), Trimming two large shoulder roasts like the one up there so they would fit into bags. Doling out bacon and sausages into smaller bags. We have a deep freeze which is amazing. But, with a little maneuvering you’d be surprised what you can fit in a standard freezer. Buying in bulk will save you money and stock your fridge and freezer until Armageddon. We are going to purchase part of a calf this summer which is another way to save money and get local meat. Find four friends and split the bill.

Past Meals of the Week-

Monday

Tuesday

Wednesday


Gyros

My friend Brittany over at B-ing paleo fabulous and I had a friendly little cook off for a going away party. Two of our friends are moving to Georgia to open up their own crossfit gym and they had a surprise going away party. Brian had said he wanted gyros. I thought it would be fun to bring these to surprise them and see our two takes on the gyro, Brittany agreed.

These are my gyros that I brought to the party. Brittany’s gyros are here on her site. We got to the party late so I didn’t get to try hers but they looked really good. She went with the authentic lamb meat. I used a combination of beef and pork. She did a pulled meat and I tried to go with ground meat on a rotisserie.

Brian was of course very diplomatic and said they were both great. So we may never know who won. It was; however, fun, challenging, and delicious. I think we might have to pair up again to try something else exciting Brittany makes such good food that she’s a good motivator.

Gyros

2.5 lbs of beef

.5 lbs of pork jowl (pretty much bacon)

1 onion finely processed and drained

1 tbsp of fresh thyme

1tbsp of fresh rosemary

1 tbsp of parsley

1 tsp of marjoram

1 tsp of red pepper

1 tsp kosher salt

1 tsp black pepper

7 cloves of garlic

juice of one lemon

Tzaziki Sauce

1 can of coconut milk

¼ red onion

1 tbsp fresh mint

4 garlic cloves

juice of one lemon

To me authentic gyros are the kind that are ground and cooked over an open rotisserie. Then when you want some you shave off some meat and add fresh veggies, feta, and tzaziki sauce. So that is what I tried to do here. After some research into how to achieve this method I set forth. I blended all the ingredients until it was a paste.

Then I tightly wrapped the meat in plastic wrap.

It was kind of like twisting a candy wrapper to get it tight.

Then I placed a heavy cook book on top of that.

The point of all this is to make a tight compact loaf that you can then skewer and rotisserie. I refrigerated my meat loaf over night to let the flavors meld and to squish the daylights out of it. The next morning I skewered the meat and placed it in my rotisserie.

T had very pessimistic views about the meat staying on the skewer. I had my fingers crossed. I mean it worked for Alton Brown! But, T was correct. It fell off after a few minutes of cooking.

So I left it on the tray and let it cook for 1.5 hours at 350 until cooked through.

When it was done I sliced it thin. Traditionally you’d eat this with pita bread. I went with romaine lettuce to keep it primal.

To assemble you take a leaf of romaine, some slices of meat, red onion sliced thin, tomatoes, cucumbers, feta crumbles (omit if you are paleo), and the tzaziki sauce (traditionally a yogurt based dressing but again, I wanted to keep it as paleo as possible). Here is Brian enjoying his second gyro of the day. I was really happy with the final product. I think it had all the flavors that I was looking for in a gyro. Next time I might try to just cook it in a loaf pan.

Brian and Sabrina we will miss you and wish you the best of luck in Savannah!


Stuffed Pork Loin

This is the recipe I said was coming later. It’s delicious. The apricots were tangy and not too sweet. I also love Chinese five spice it’s such a different seasoning that you don’t taste too often but is super flavorful.

Stuffed Pork Loin

~3 lbs of pork

1/2 an onion diced

1/2 cup of pecans chopped

6 dried apricots diced

4 cloves of garlic

3 tsp of chinese five spice

5 long strips of bacon

salt

Mix onion, pecans, apricots,garlic, and half of the seasoning together in a bowl.

Cut a slit into the loin almost all the way across the width of the loin.

Stuff the slit with your nut mixture.

Carefully pat the mixture down and cover with other half of loin. pin the pork closed with some long toothpicks. Use remaining seasoning on the out side of the pork and add a bit of salt. Brown both sides of your pork being careful to not let your pork open up spilling all of it’s contents when flipping. I accidentally let mine get a bit too dark here but it was still good. Wrap your browned loin in bacon. Place back in pan and transfer to the oven at 350.

Serve with some Creamed spinach from this recipe. enjoy!


Creamed Spinach

I was craving some creamed spinach the other day. Since I’m trying to lose weight right now I didn’t want to use any dairy. I decided to try out some coconut milk and see how that tasted. It came out super good. I was so happy with it I ate it for breakfast and dinner again the next day. T even asked for me to make some more. I think it was a very simple success.

Creamed Spinach

1 block of frozen spinach

1/2 an onion diced

4 cloves of garlic minced

1/2 can of coconut milk

tsp Cajun seasoning

In a pan heat up some fat. I have been using rendered chicken fat lately but use what you like. Cook the onions and garlic until they are crispy and browned.

Add the spinach. Cook until most of the water has cooked off. Add the coconut milk and seasoning. Eat. seriously it’s that easy and so tasty.

This is served with a stuffed pork loin that I will share the recipe for later in the week.

*please go here and like us on Facebook http://www.facebook.com/Leetsstreet*